1. I place the plasticard in, painted, and then the envirotex stuck to the paint.
2. The shape I went for wasn't airtight, so I sealed the joins with Vallejo Water Effects, but then didn't wait for it to fully dry.
3. I am basically just a shitcunt
So here it is in all its pathetic glory:

Lol. I pulled it off, spent a few minutes trimming things and seeing if I could save it, and then said FUCK IT IT LOOKS SHIT and pulled the envirotex and other stuff off, and sanded the plinth smooth, sprayed black and left it at that. I did have my little plaque that I had painted, which I attached, added some seaweed and algae and now that is done!

I made it a bit darker than the model itself so it wouldn't draw more attention, but it still ties in. I am very happy with the overall look of this finished product. :) Hopefully someone will purchase it and enjoy it as much as I do!
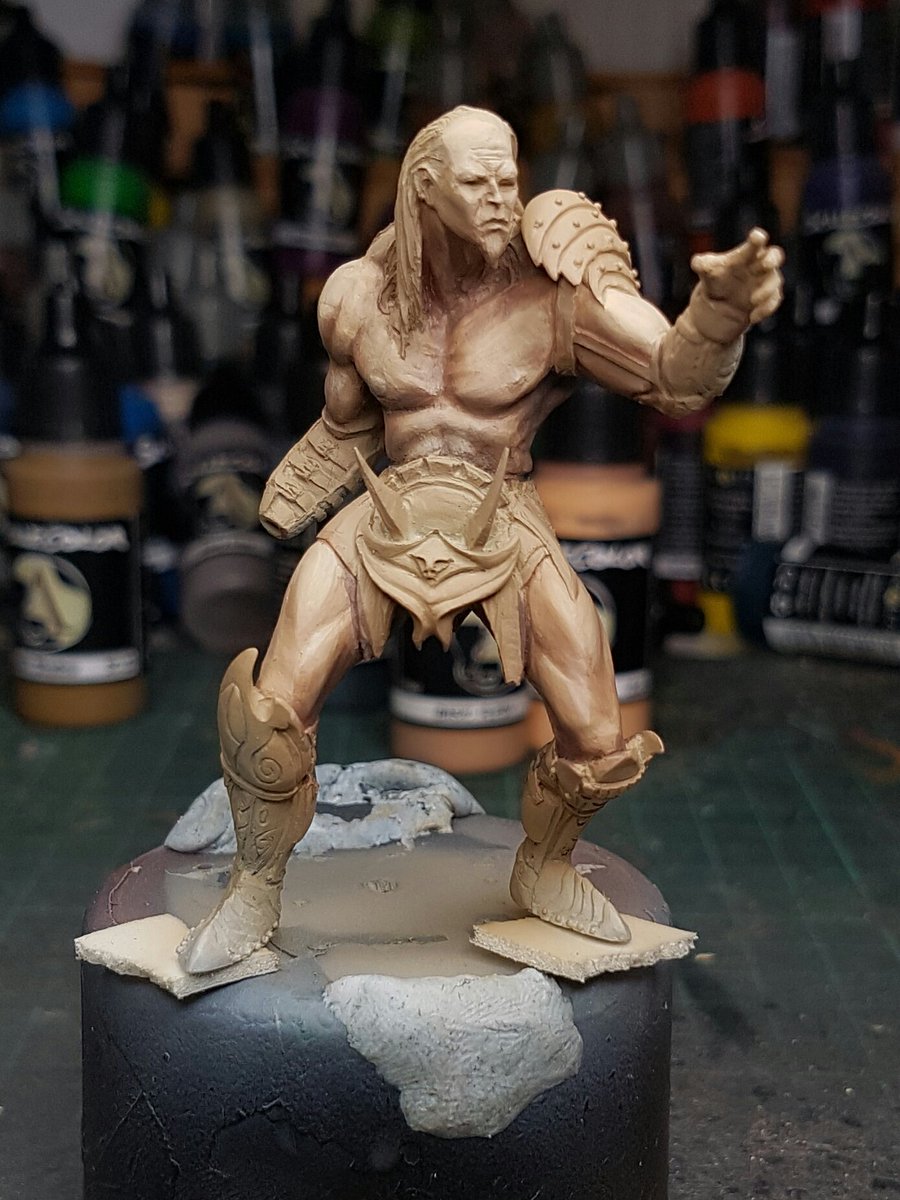
So back onto the Reaper. I had a concept for the model which I got from looking at it closer, the eyes are not well defined. I like the shape of the sockets though, so bleeding eyes, either actual blood like this, or black stuff oozing out like Maya from Heroes.

One thing I have noticed about models now is I am really able to tell when a cast isn't as crisp. I am struggling with smoothness on this model, but it isn't because of my painting, its the texture on the figure itself. It's slightly pitted, or rough, or just poorly cast or sculpted. Not sure which, and I did try to rectify this prior to painting but it is still noticeable in some areas.
So whilst I am enjoying the model, the volumes and the colour I chose for the skin, it hasn't been as enjoyable as Surt was to paint (Scale75 busts are easily the two best casts I've painted to date, perhaps the Crimson Priest from Nocturna was as good too actually). Anyway, the first layer was done with airbrush, obviously went for a more tanned skin for an Egyptian, (interestingly I went pinker for Surt, as I figured he was living underwater and was getting old, so wouldn't be in the sun a lot), and once I got a smooth surface I just started adding highlights and shades. After I did this for a bit, I did a few glazes with the airbrush, and this is the first stage:

The next stage was to add a bit of colour to the other areas so the actual values of the skin would be more apparent. Sometimes you think you need to highlight/ shade a lot, but that is because it is sitting next to white or black.
I then kept working on the skin, adding more deeper shades, and starting to soften the highlights as well. Another airbrush glaze and this is where the Reaper is so far:


The purple was an idea I had, as I had actually used a purple on the mushrooms on the base, but then desaturated and toned it down a lot, to tie it together better. I checked the model beside the base and it was clear the purple wasn't working at all, so I had to come up with a different idea.


And what I have decided on is, again, looking at the base, the same blue colour I've used on the base, only a much more saturated and intense version of it, with a lot more vibrancy. I am excited now. The colours are all coming together, the model is interesting to paint, if not the most enjoyable, and I think this is going to be a really nice little project when it is all finished.
Oh, and for my plaque for this model, I'll be doing a parchment type effect, a scroll of papyrus or similar.
Cheers
Trent
No comments:
Post a Comment