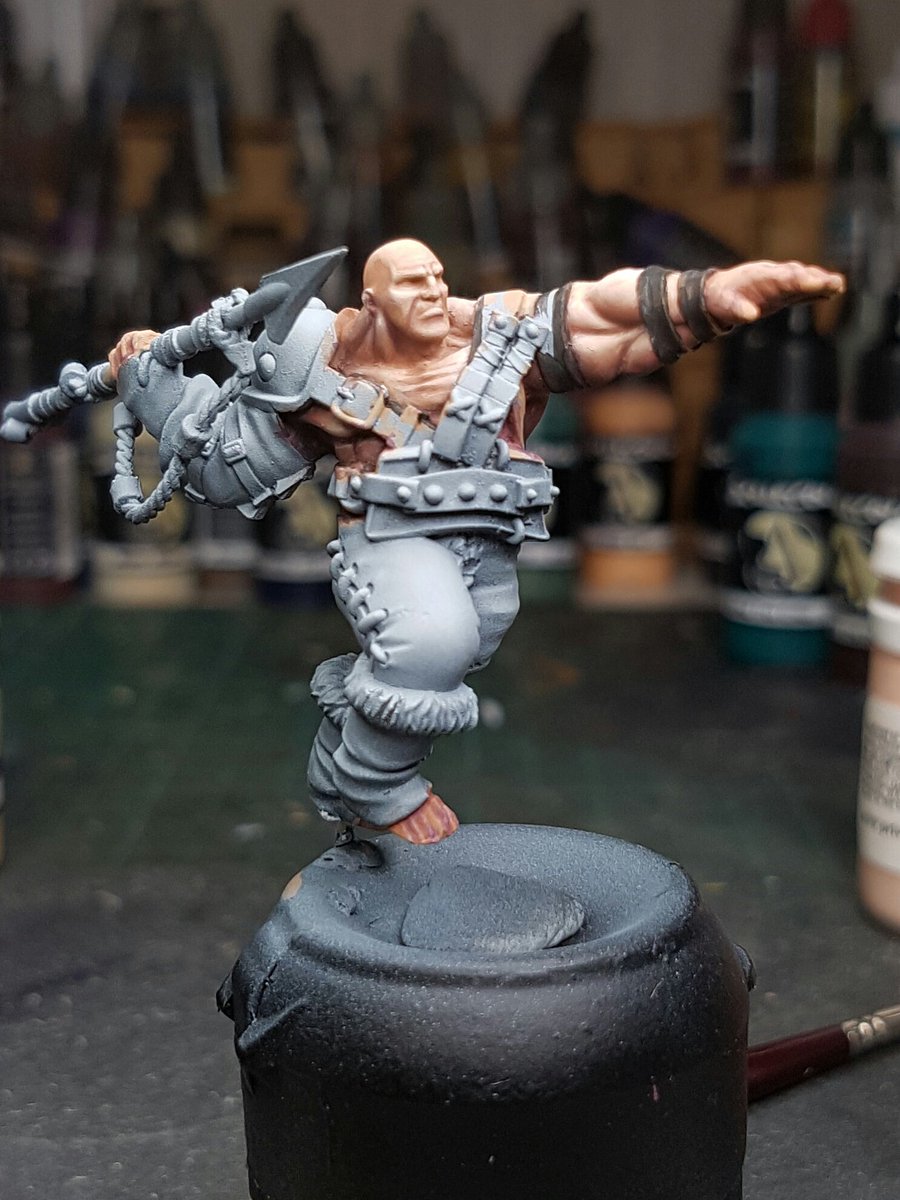
Today I am going to muse about glazing. If you are not familiar with the technique, it generally uses heavily diluted paint, of which the majority is removed from the brush by a paper towel. The brush still retains a decent amount of paint, it just does not flow off and flood the model. Using a wash is where you let the paint and water combined to do the work, where the pigment will settle to the recesses, and the water will stay on the raised areas and evaporate.
Glazing is tricky business. At Cancon next year Mark Soley is running a class on Glazing which I am extremely looking forward to. As an example of the sort of results glazing can achieve, here is one of Mark's models:
I've seen this model in the flesh and the photos simply do not do it justice. It is awe inspiring how smooth the blending is, as well as how bright the highest points of the flesh tones are. For some more pictures check here: http://www.puttyandpaint.com/projects/2474
So, glazing creates a very dilute tint over the surface. Multiple layers increases the strength of the tint. You can control which areas you are painting over with the brush, so that you only glaze specific areas. Using different colours in your shadows and recesses can create interest in the colours and create more contrast than merely using lighter and darker shades of the same tone.
I have spent this year researching and taking classes and learning about painting miniatures, and one of the series I downloaded was the miniature mentor series. I've got mixed things to say about the structure of the videos, in particular the length of the videos and the host, as he spends far too much time saying "great job" and not enough time letting these painters talk. The production quality is very high though and some of the lessons are really great, Sebastian Archer's painting of a Troll is one of the best ones. In it he demonstrates glazing used a way to soften harsh blending and it is very interesting to see the effects. He uses three, four or even five layers of ultra dilute paint and he slaps it on in a very cavalier fashion, which is fascinating to see if you've ever seen Seb's models which are immaculate. The effect is very noticeable when you compare the before and after yet its hard to see a result after each layer.
I have been expanding my use of the airbrush recently and one of the things I wanted to try was using the airbrush to glaze in the same way Seb did, yet ideally a fair bit quicker, and hopefully saving some time also.
Here is the model as I painted it last night, and I was very unhappy with the skin. I felt the transitions were really noticeable and the overall effect was not working. I decided to try the airbrush glaze a few times and see if it helped.
I have a mixture of window cleaner, Vallejo thinner and water (1/3 each) that I use as a diluter for all my airbrush stuff, and I mixed roughly 2/3 of this with 1/3 paint. I added a bit of satin varnish too, so that it would adhere and not rub off if I went back in with the brush, which I've had happen in the past. It also has a nice finish which I think adds to a final product.
Here is the model after the thin layers, and some more colours painted on:
Once again my very strong photography is definitely making this more difficult... but it really made a huge difference to how I felt about the skin. It did up the overall brightness a little, and reduced the contrast I had painted in, but overall it really softened the transitions and I am very happy with that. As you can see I have kicked on a bit with him.
I made a decision to go for the same colour scheme as I painted on my Fishermen team that I entered into the Crystal Dragon earlier this year. They didnt quite manage a Bronze although I was told a number of the models would have qualified, but the overall average dropped it down. Kraken was one of the good ones.
Here is a comparison shot of my painting since December/ January, and now. Remembering that this Kraken is still a WIP!
Thats all for this post!
Deno


No comments:
Post a Comment