So I tried to think about the scheme and what colour would suit and I decided a cold purple might look good. I did a few thin glazes of P3 purple and Dark Sea Blue and thanks to the highlighting already done underneath it didn't take long for it to start looking pretty reasonable.

As you can see, I also airbrushed the base. I talked a bit about how I did the water in my Kraken blog post but its basically a few thin layers of the Vallejo Water Effects. I definitely refined the technique and had a much better idea of what I was looking for this time, and at this point I was really happy with the water.
Onto the gold, which needed to pop a lot more than it did.

I am feeling a little bit better about metals in general now, it has been something of a struggle for me since I've started painting to a higher standard to really get it right. I am starting to feel a lot better about it since I started using the VMA metallics. The concentration of pigments is much higher in the thinner paint, meaning it is much stronger to glaze with. I need to keep painting it more but I am starting to feel like I can get it right, which is good.
All that was left now, was the finishing touches. The model is supplied with some addons, feathers and a little crabby to sit on his hat. I undercoated them and then went to town with the airbrush. I was initially thinking pretty crazy with the colours, really bright, garish splashes of all warm colours, as you can see here!

I was just not brave enough (or stupid enough) to go for it, although looking back at it now I think I may have missed an opportunity. It's possible they may have detracted from the final piece, but I think they also could have made it really pop, and keeping with the ultra saturated colours.
In the end, I toned them way down with lots of neutral glaze colours and made them a very cold, pastel colour. They really fit in well with the rest of the model, but a part of me is still on the fence. :)
Little crabby was done over a white base with lots of dark cold glazes, but I put a bit of yellow into his claws.
The final step was adding the foam to the surface of the water, which was Vallejo Water Effects Gel mixed with Vallejo Foam and Snow. The Foam and Snow is a fucking terrible product, and I've not found a good use for it before, but the mixture of about 1 part foam and 2 parts gel seemed to look alright. I think it finished the model off nicely.
I glued down my feathers and crabby, and touched up the glue stains with some brown and then matt varnish, and then took some photos! Stick a fork in him, he is all done!
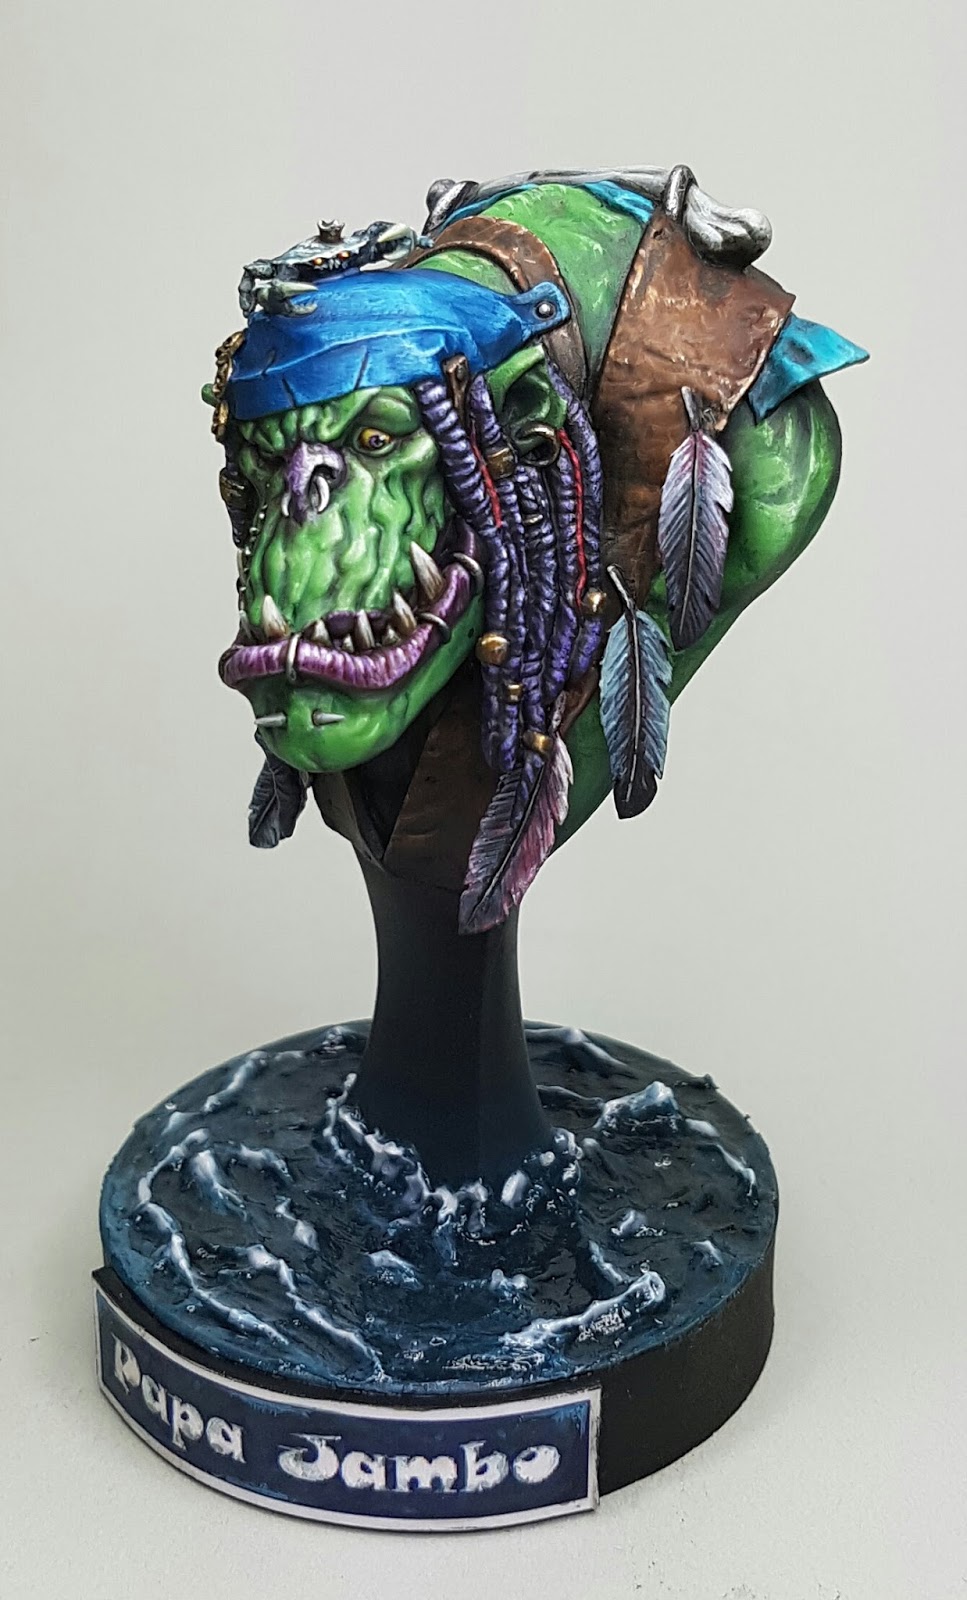
You can check out more pics of him here on Putty and Paint: Papa Jambo by Big Deno
Hope you enjoyed this step by step of the process of painting this incredible bust. Appreciate your feedback. If you have specific things you want me to post about, feel free to let me know.
Tomorrow night I am back into the Haleys, with some interesting colour choice decisions to make!
Cheers
Trent
No comments:
Post a Comment