I actually genuinely started taking painting seriously earlier in the year, and the models I decided to cut my teeth on were the Smog Riders range from Scale 75. They are actually a really beautiful product, the shapes are designed for painting mostly, with lots of nice skin surfaces, big eyes and simple hair. The first guy I did was Colonel Clayton, and I think did Clawfinger Jack, and a few others. I ordered a few more to keep me going, still not feeling up to painting a proper model yet, and as I was looking I noticed a pretty cool theme going through most of the models. They all had the little Kraken symbol, or some interesting tie in to the aquatic theme. I had this idea about a cool little diorama showing off the Smog Riders, and when I saw the walrus crime lord, I was struck by inspiration.
I was going to build the headquarters of the Smog Riders crime gang.
Firstly, here are the models I decided to use. Dr Morsiarty, the crime lord himself, Kelly Kraken, his witch lieutenant, Duane Van Der Shark, the hired muscle, Octopii and Rafter, to fill some spaces and be little fucking legends, and Hans Kruger, the sniper.
I purchased these models and went utterly gung ho on building a display base. This is my first attempt at anything like this at all!


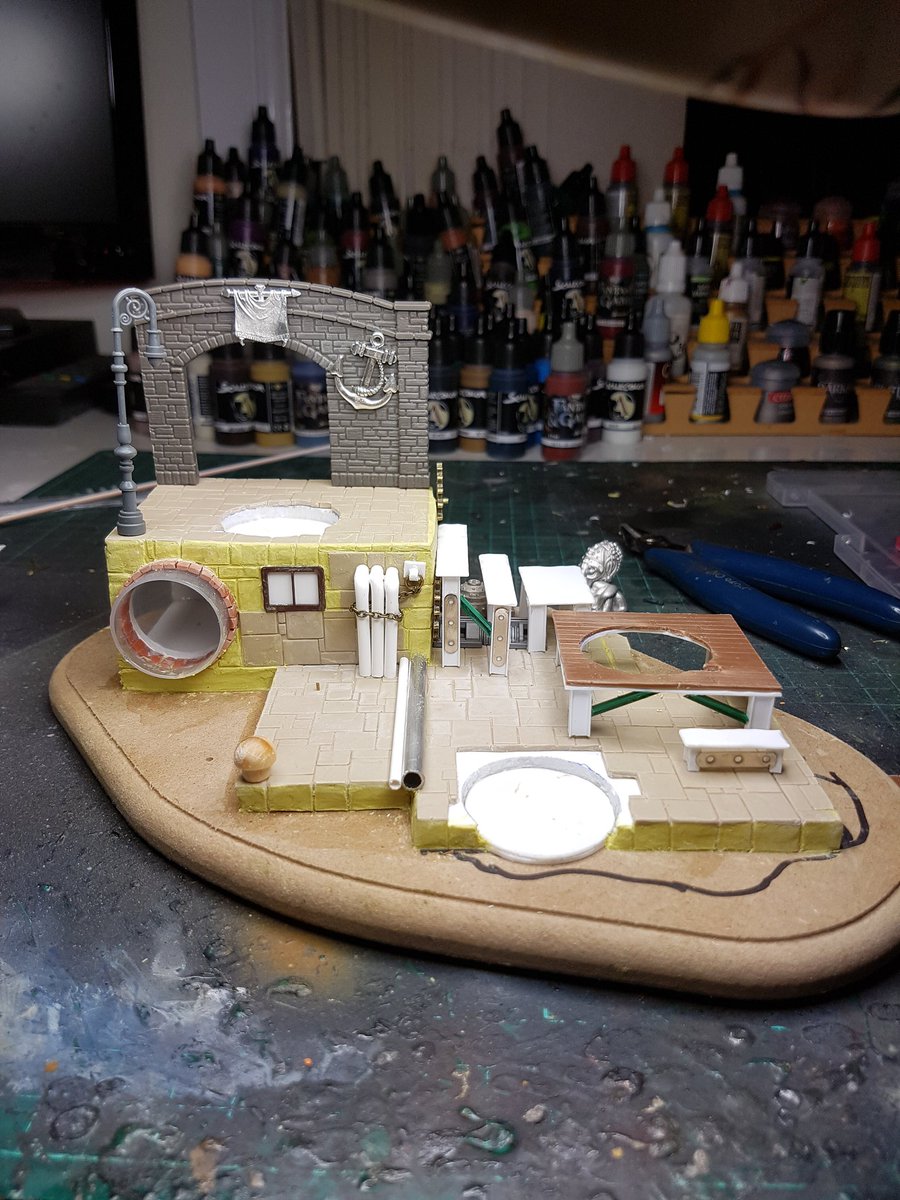
I had this vision of a sewer pumping out some rubbish onto the docks, with actual bases made up for the models so I could pull them off and use them for... I dunno what. The initial idea was wooden platforms to walk down to the lower levels. You can immediately see this isn't really working. Too much space and lots of failed ideas happening here.
Shelved the project for a bit, then came back with some fresh ideas a few days later. I decided I needed some height on the left hand side, creating a staircase sort of view, hopefully drawing the eye down in a natural way. Added more pipes, and it was beginning to look a little fuller. I realised at this point that a docks should have lots and lots of stuff everywhere, barrels, boxes, crates, etc. So I ordered some, from BNA Model World and tabletop-art.de.
Here is the models on their bases, with the basic idea now. It doesn't look great. I know this, but I cannot see where I am going wrong at the moment.


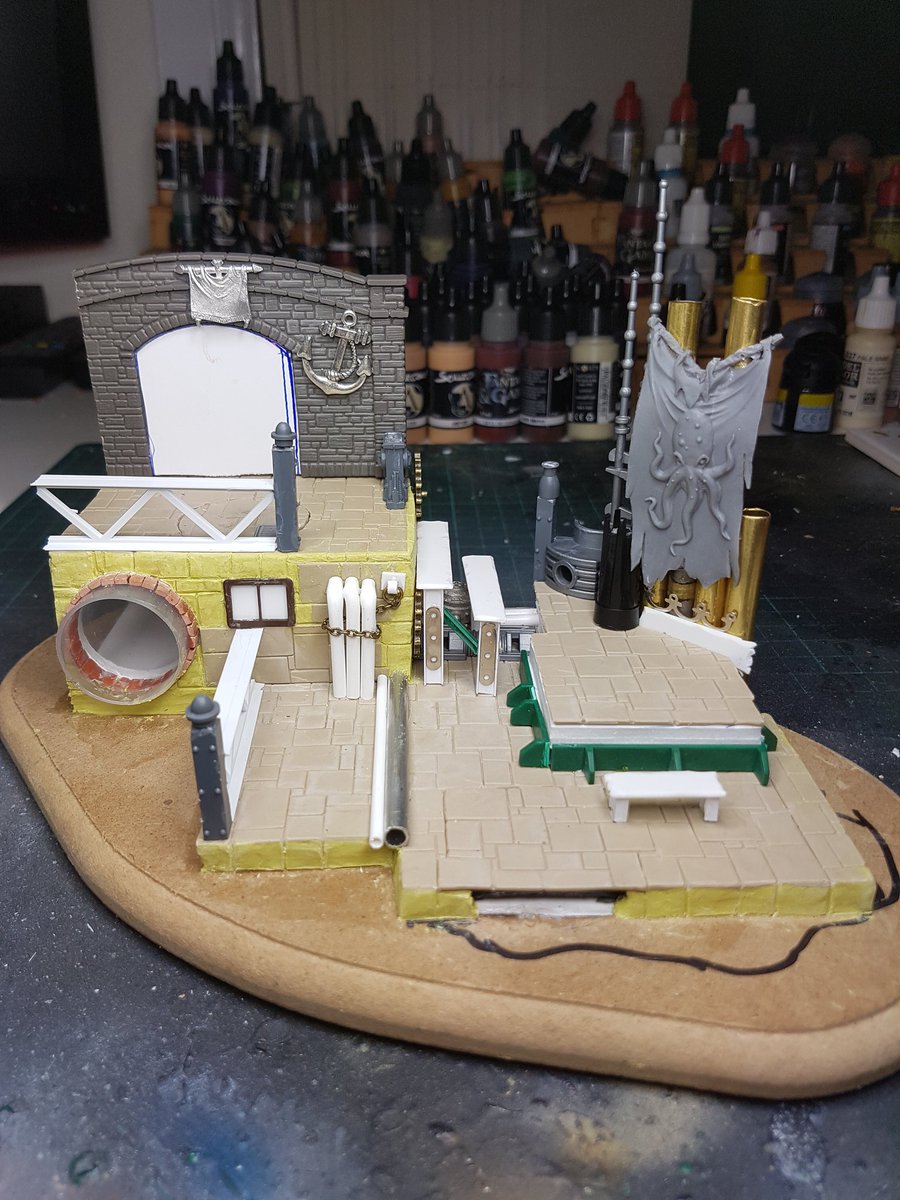
Again, just a few things not working for me now, but it is certainly starting to come together a lot more. The first is the wall. It was supposed to be an inn or something, the headquarters of the gang. It looks like shit, because the scale of the bricks is so different to the scale of the tiling. It was jarring, and despite me trying to work on a door with balsa and some cool pewter sheet, I failed. It had to come off. All the while this was going on I was finding cool Octopus models and just adding them to the piece.


Although I still wasnt totall happy with the placement of the models, I figured that I had enough pieces to fill the space well, have a lot of interesting visual elements, but not feel cramped or cluttered.
So I pulled all the models off, glued down my boxes and crates! Now the funny thing about this, is I started this project about four months ago, and I always imagined from the start that it would have a water element. Yet, I really only figured out how to do a good water element in the last few weeks, and suddenly I got to do it for this. I filled it in using the Vallejo gel, and once it dried, got undercoating!

I used the airbrush to lay down a few brown and sandy tones first, to create some interest, then did a few light passes with light sea grey. I wanted quite a pale base tone to work with, as I planned on using a number of washes to bring them back. I used successive washes of Strong Tone, Armour Brown, and Green Inktensity to get some good shading in there. Painted the bits in brown, did some black washes, and highlighted some edges with sea grey and white.
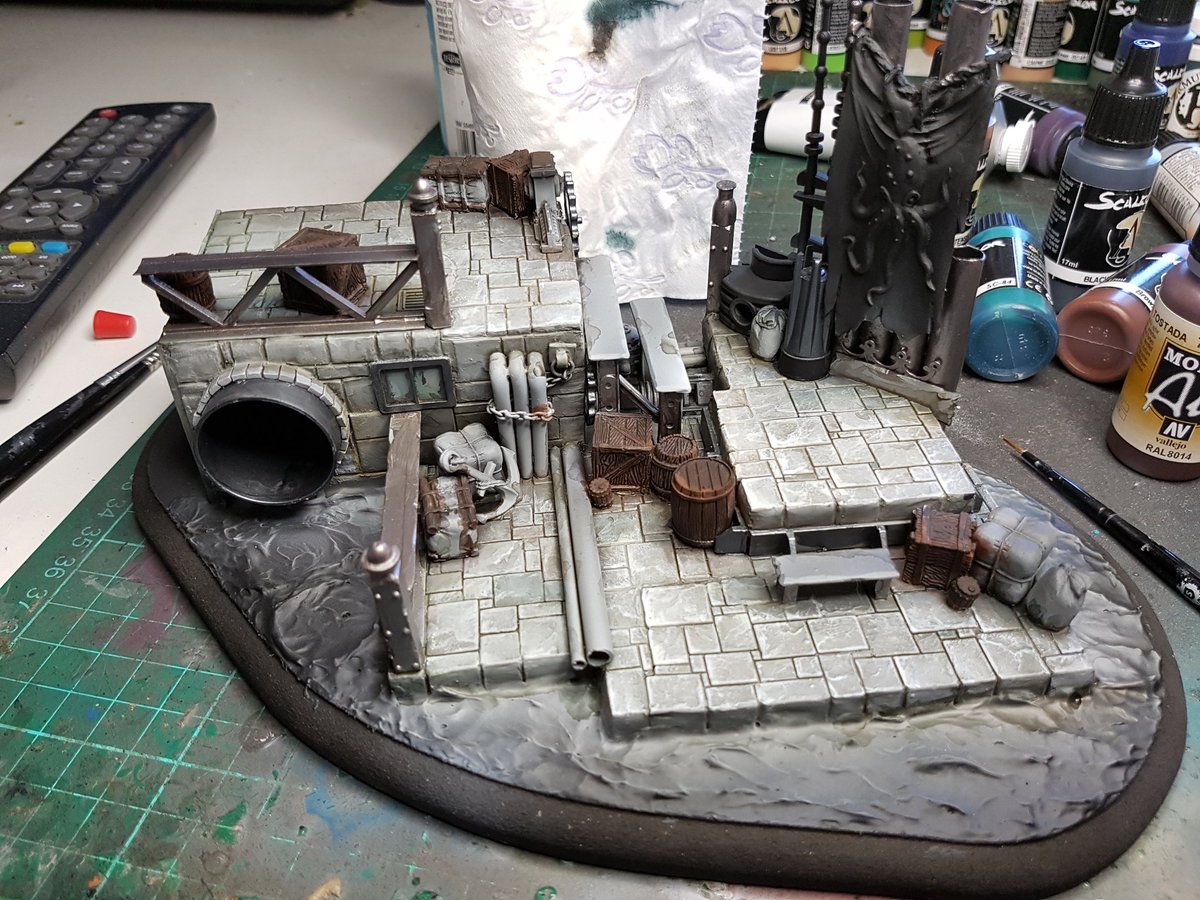
I was already pretty stoked with how it was looking. But I've learnt a lot recently about pushing glazes and colours and creating more depth in things, and so I grabbed more colours, DSB, Tank Brown mixed with green, black, and began washing these areas more. I also painted the water, which was a lot of DSB, Flat Blue, Inktense Green, Black and Artist acrylics white in various shades, wet blended together and softened a lot.

At this point I added the metals, and started putting in rust effects, using a tan colour for the satchels and sacks, and copper piping. I tried to keep it all muted, it is hard to remember that this is not supposed to be the focal point, yet I want it to be technically well painted. You can see I've got more highlighting towards the corner of the top area, the left corner of the middle area and the centre of the lower sections. This is where the three main pieces will be standing, so hopefully this draws the eye towards it.
And it was at this stage I mixed up a little something of my own creation, inspired by David Soper of Sprokets Small World: Bicarb Soda, green pigment, Inktense Chestnut and Matt Varnish, with a touch of water. Depending on the mixture you can have it be quite thick and textured, or thin and more like a glaze. I used this to create a moss, or at least the first stages of moss around the edges of the plinth where the water meets it. I still will be going in an adding actual moss pads in some areas, and using a bit more of the bicarb mixture. I gave the dried mixture a bit of Strong Tone to just shade it, and highlighted a bit with some lighter green. It can dry quite flat, being pigments and not really any depth, but the texture it creates is really good.


And it is at this point that I am finished painting for the evening!
Tomorrow is the big trip, to Germany. I am very excited at the opportunity to learn, getting to paint a new bust, and hopefully making some new friends as wel.
Thanks for following, feel free to leave some comments below or on Twitter if you are enjoying the blog.
Cheers
Trent
No comments:
Post a Comment