There is a good reason for that. I went away for a week to Melbourne and while I was there my usual painting while travelling didn't come together. The lighting was terrible and I couldn't get excited when the colours were so inaccurate to my eye. I did some small stuff but by the end of the week I really lost motivation for it.
I came home really excited to see my fiance and we headed up to the beach for a few days, with my family. It was a great way to unwind. Another thing I had agreed upon with her was that I would take some time off painting. I do spend a shitload of time painting, researching techniques, model ideas, purchasing bits and bobs and just fucking around really. So I promised her a week of no painting. We played some computer games together (she recently got into WoW and I have been dabbling a bit also), and after the week ended I didn't really feel like picking back up.
So I stalled. I left the table for a bit. I finished off the Beastman but I was unhappy with the model after the Melbourne fail and so I didn't end up enjoying it much. I started mucking around with the present for my Best Man at my wedding which is getting quite close now, a Skink Shaman from the Warhammer universe.
But I still felt myself struggling a bit.
In the end it came down to two things. I have a commission job that I cannot get excited about right now, and I felt like I needed to cut some chaff, and clear things out of my desk to give myself a space that was more exciting, and less demonstrably fail filled thanks to all my incomplete projects (if only Knechty could see me now).
The moment I cleaned my desk, removed a lot of stuff that I was not excited about from my sight, I started getting more excited for painting.
The Skink started coming back together a bit, but I am not rushing the finished product there so I put it aside for a little bit. Istill have the commission models but I know that painting them will be not great for my motivation so I pulled out a model that I think has been my most exciting in a while: The Urkin Bloodrage Shaman from the Twisted Game.

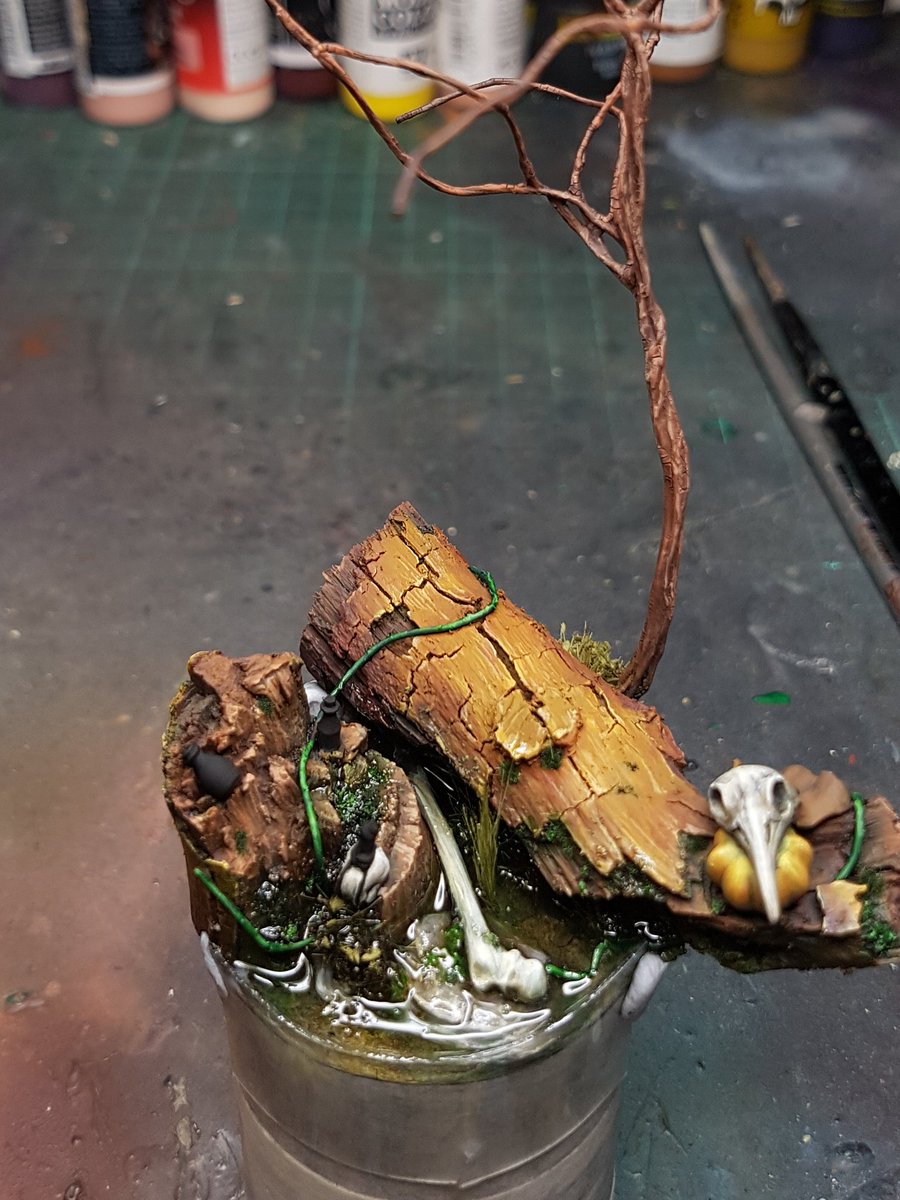
This was my first attempt at putting together something interesting for this model. It is different to how I normally approach a base, and you can see that it has a nice flow from the shape of the weapon down along the curve of the log.

I added some more detailing and put a tree on the base as well. Looking at the tree now (it is a little more progressed) I am not sure that it is adding anything to the scene.
I undercoated the base and airbrushed some colours and then just sort of mucked around with colours and shades and more airbrushing and pigments until I reached this:

Felt too browny and orangy without any cold colours. I initially was going for a desert vibe, but somewhere along the way I changed my mind and started thinking like a bayou scene, with water. I realised it needed a lot more green.

A lot more green!

You can see here that I have added my first layer of envirotex. I have had mixed success with that product, but I persisted and I finally felt like I got a handle on its properties now. Funnily enough, you practice with something for long enough and you get better at using it... who knew?
At this point I started painting old mate. Again, had no firm idea on where to go, but I wanted the skin to look vibrant and filled with lots of different colours, including green.


There is a lot of depth in the skin, but I am not finished the highlights or shades yet. I need to get some more basecoats of other areas down so I can see what it actually looks like.


Starting with blue. He sort of reminds me of a British sea captain or something. Anyway I can see a little bit more of the colours now, and it gives me a better frame of reference for the contrast needed on the skin.
Back to the base, and I did a second layer of envirotex, and did a lot better job this time of sealing it. I also managed to remove the bubbles more effectively this time also. It is just a much better finish all round.
Back to the tree. It has been a bit frustrating for me that I have not been able to effectively make a willow tree. I can see it in my head, but I cannot seem to create that vision in a model. I tried again, but it looked rubbish, so I went back to the product that is most consistently good, the JOEFix branches.

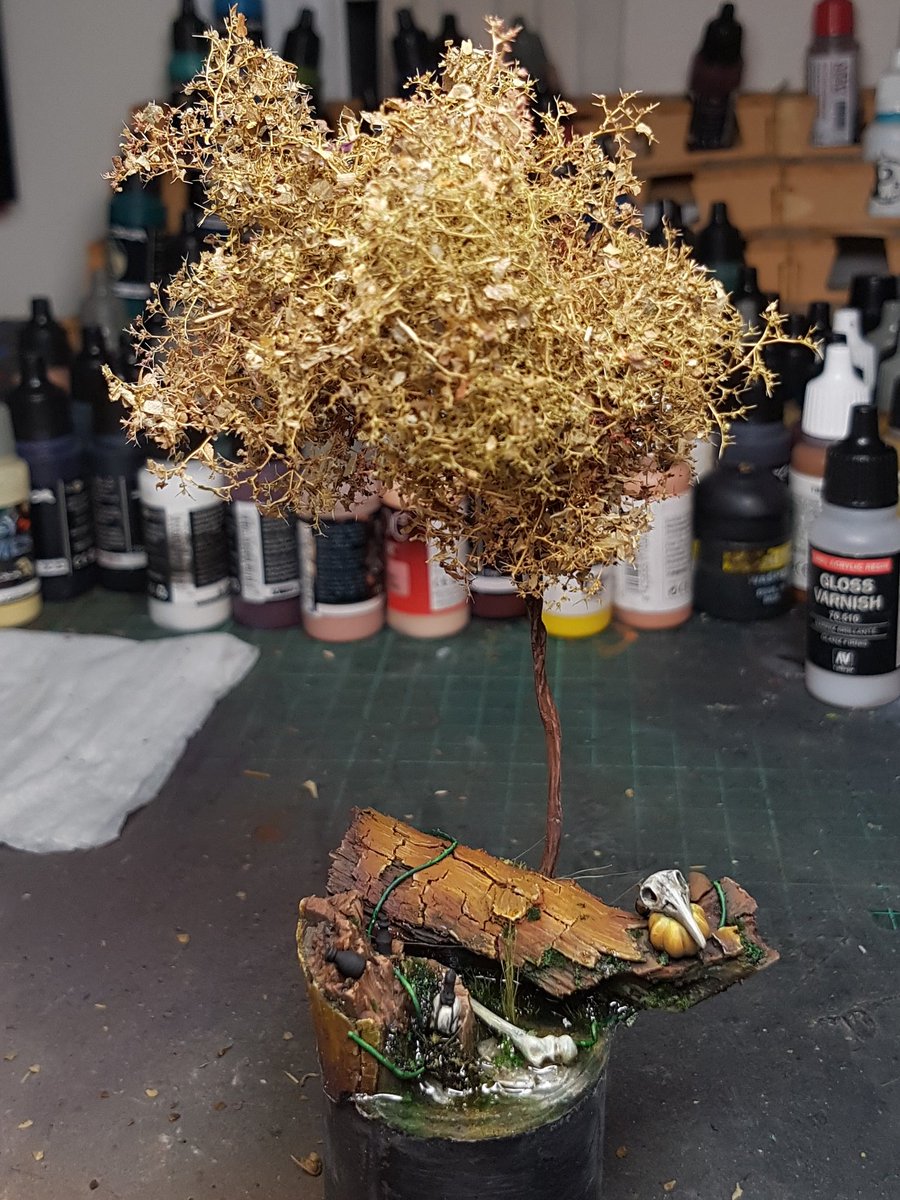
I sprayed hairspray on the tree and sprinkled basil on it, until the foliage looked a lot thicker.
I felt like it was way too overpowering, so I crunched it all together to try and make it less sizable and distracting.

This is where I left it tonight. I think I am going to have to scrap the tree altogether, it feels way too distracting for the whole model. Unfortunately taking it off makes the plinth feel a little bit too large to me, so I might need to come up with an alternate idea for something with some height to add to that back area.
I'd love some suggestions, on Twitter or on here, because I really want to keep this positive energy and motivation going.
Thanks
Trent
You need to put kinks in your post so that we don't have to find the models via Bing.
ReplyDeleteWhen you say kinks, I'll assume you mean links, and I will guess you mean for the models, and where to buy them? I have linked a few manufacturers in previous posts, I will try and do it more frequently.
DeleteYeah. Auto correct is a total winner. It just allows me to make more impulse buys!
DeleteHey Trent. Your willows aren't turning out because you are overlooking the basic design of a willow. The 'green' wood and leaves are the very end of the branch system where you are simply draping the greenwood over the branches themselves. ie it's akin to sticking leaves on your main branches rather then the small twigs at the end of the branches.
ReplyDelete